Wednesday, May 25, 2011

Our First Sewing Pattern To Be Released!

Well, we are almost there!
The pattern pieces are with the digitizer and
being converted from my hand drawn pieces to
beautiful clean lined computer generated images... YEAH! 
I miss my days working in the design room with the first pattern makers. 
Creating this pattern was like a trip back in time for me.
 To the days when I was working in New York in the apparel industry. 
I really had so much fun that it didn't feel like work :) 

The big day is Wednesday, June 1st
You will be able to purchase the PDF pattern
from my Etsy shop.
There is an Etsy tab at the top of my blog.
Just click on it to be taken there.

I would also like to take a moment and thank
Kim at 733, for all her support and allowing me
to use the photos of her daughter wearing the original dress!

Tuesday, May 24, 2011

Toddler Tuesday's #4

It's that time of the week again!
Link your your toddler/child related project up.
Don't forget to grab a button so others can join in the fun!
I'm so excited to see what everyone has been working on this week!


Powered by Linky Tools
Click here to enter your link and view this Linky Tools list...

Monday, May 23, 2011

Smocking Tutorials

Eversince the birth of my daughter, I have developed
a sort of obsession with smocking.
I love searching the Internet for inspiration.
Little smocked dresses just seem to
remind me of a simpler time;
when a mother to be would spend her pregnancy stitching
together garments for her new baby.
I don't know about you, but I barely have enough time to do the laundry
let alone smock a bishop style gown for my daughter.
(Don't be fooled; this doesn't mean I don't dream about it!)
Below are some links to a few smocking tutorials.
The following three styles of smocking
look like they would be easy and go fast.
Don't be surprised if you stop by here in a few weeks and find
I have made the bean a dress using one of these methods.

I love the look of this honeycomb style

I have the prefect fabric for this diamond style smocking

This lattice style would make an amazing holiday dress!

What are you current obsessions?

Thursday, May 19, 2011

I swear I have OCD

It occurred to me recently while looking at old projects
that I so have crafter's OCD!
I will rip things out over and over till I get all my seams to match.
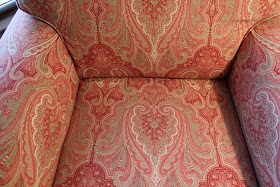
I get such a high when I can get the pattern on the fabric
to match when it crosses over a seam.
I get really excited when I manage to carry the pattern
on the fabric from the top of the piece of furniture
seamlessly down the entire piece

The best part is when the piece is complete. 
I have such a feeling of satisfaction knowing all the little
places where the pattern lines up perfect.
I bet the average person wouldn't even notice if they
were off by a 1/4" or so.  But for me they need to be dead on.

Now if I could carry my OCD qualities over to my housework ...


Wednesday, May 18, 2011

Grosgrain Ribbon Flower Tutorial


I am so excited to share with you my tutorial for making theses
grosgrain ribbon flowers

Supplies:
1 1/2 to 2 yards of 3" wide grosgrain ribbon
scrap of coordinating fabric
3 small buttons that can be fabric covered
jewelers pin for back

Step 1:
Using straight pins box pleat your ribbon. 
This particular flower I made my box pleats 1"wide.
In the pat I have done them as small as 1/2" wide.


Step 2:
Press the ribbon using your iron.
Set your iron to on of your hottest settings
so as to heat set the box pleats.
Be careful not to make it so hot that you melt your ribbon.

Step 3:
Using straight pins begin tucking the pleats
into one and other to form a circle.  Once you
have come up with a shape/size you are satisfied with
tack in place the inner edge.


Step 4:
Repeat step 3 but make your circle smaller.
Set your smaller circle inside the larger and join the two together.
The average flower uses 3 to 4 circles.

Step 5:
Flip your completed flower over and secure your fabric backing.
This is where you will attach your jewelers pin later.


please note the center of your flower will be open and you will see your backing fabric.
do not worry this is correct.  your fabric covered buttons will fill this space.

Step 6:
Follow the directions on the box of your fabric cover buttons
to cover 3 with your grosgrain ribbon.
At this point attach your buttons and pin.


You are done!


 If you make one please send me a photo of you in your new flower broach.
I love seeing what my followers create!

Tuesday, May 17, 2011

Toddler Tuesday's #3

It's that time of the week again!
Link your your toddler/child related project up.
Don't forget to grab a button so others can join in the fun!
I'm so excited to see what everyone has been working on this week!


Monday, May 16, 2011

One Stylin' Little Man


I just wanted to share pics from my latest project.
Typically I make all my Christening garments from the
mother's wedding gown for this one I purchased some silk dupioni.
I love this shade of white and how crisp the fabric was. 
I feel it added a level of formality to the romper.


 I don't know about you but I think there is something so
irresistible about baby clothes.  I'm just lovin' the little sleeves!

Six tiny pin tucks frame the hand embroidered cross. 
I used an opalescent thread to embroider the cross.
I am so happy with the results;
 it almost has the same nubbiness of the dupioni.
Add a little Jeff Cap
and this little man will be stylin' on his big day!


Bling Bling!


I had received a special request recently. 
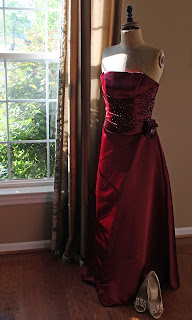
I was asked to "Bling Up" a prom dress. 
Brooke a conservative senior, after talking with her friends
felt that her prom dress was lacking that extra something.
So I was commissioned to add a little Bling to her dress.
First I created a flower broach.

I began by tracing a CD on her wrap; which she wasn't planning on wearing.
I then cut out the two CD sized circles.
Next I cut two more circles that were about 1" smaller.
Now the fun begins!

First I distressed the circles.  I really made a point of fraying the edges.
After I had finished distressing the circles
I held them over a lit candle to melt the edges.
*Please do this in a well ventilated room as the fumes from your burning fabric could be toxic*
I not only singed the edges but I also melted the inner part of the circles.
This helped to give the pieces diminension.
It was so much fun to watch the fabric curl and warp while I held it over the flame.


To finish the flower all I did was stack the circles from largest to smallest.
I added some frayed ribbon and a few beads.

It was at this point the beading began ...


and some more beads ...
several hours later
Bling ... Bling ... Bling

I'm really happy with how the dress turned out.
I still find it funny that this dramtic transformation
came about from a few beads and a lit candle!


Wednesday, May 11, 2011

Pinkalicious

Remember this photo...
Well it is a collection of supplies that was
used to make a party dress for Kim at
Her daughter celebrated her second birthday last weekend
All I can say is she is one super organized Mom
to have been able to pull off such an amazing party!
If your daughter is into the Pinkalicious books
 you need to check out her party post.
It's full of great ideas.

Anyway now that the party is over I can share the following photos with you!
I couldn't have asked for a sweeter model for my first pattern!
Yes, you read that correctly I am going to be placing this
Fairylicious Pattern for sale in my Etsy Shoppe on June 1st! 
Be sure to become a follower; since I have a big surprise planned
to celebrate the release of my first pattern. 

Last night I read Willow a book called Princess Party
and the last sentence goes something like this,
"Princesses are incredible girls
they love to dress up, use their imaginations and play with gusto!"
Based on the that statement I have a feeling Little Olivia is an incredible girl too!

I'd love to know what your incredible girl is into theses days ...

Tuesday, May 10, 2011

Toddler Tuesday's #2

Okay it's that time again and I can't wait to see
all the Toddler related projects you ladies have created this week!
Don't forget to grab a button so others can follow along


Thursday, May 5, 2011

Three Generations


I am so in love with this photo that was given to me by one of my clients.
Here is her little daughter that they wanted so badly,
wearing her wedding gown that was refashioned as a christening gown,
while holding onto her grandmother's rosary beads.
I'm just in awh at the way three generations are present in this photograph.
In case I haven't mentioned it I love the families I work for.
Hearing the specail stories that surround a childs christening
make the late nights and long hours worth it.


Why do you enjoy creating for others?

Tuesday, May 3, 2011

Toddler Tuesday's #1


So here it is my first Toddler Tuesday Party ... Ewhhh ... I'm so excited! 
This week I wanted to high light a recent project.
I was hired to created a birthday party costume for this cutie pie.
Don't you just feel the need to pinch those cheeks?
Anyway, the party theme was the Imagination Movers
Below are a few pics of the party costume


Now it's your turn to show off what you've been crafting for your little toddler
the most viewed link will be my feature project next week
{just a few party guidlines}

To link up, I would first love for you to follow my blog.
Link up your crafts, recipes, home decor....
anything that has been made by you
that is toddler related!
Link back here by grabbing the Toddler Tuesday's button on my sidebar and posting it either in your post or somewhere on your blog to let others know you've joined the party!
If you see something you like, click on it and leave them a comment.
Everyone loves alittle positive feedback!

Also don't forget to vote for the knock it off contest at 733